Monday, December 28, 2015

Christmas day Tradition: Cuban Sandwiches


Dad slicing the pork and our white German shepherd
longing for some scraps
I love cooking at home in Texas, both the fact that the kitchen is large, well stocked and I get to cook with my mother. I've posted about Noche Buena in the past (and also a short post about Cuban sandwiches in 2010), but this year's Christmas was a little different. Usually we celebrate Noche Buena on Christmas Eve, but making a pork leg, yucca, black beans, plantains, watercress salad, and flan.  A true Caribbean feast. However, this year we decided to take it easy and ordered a honey baked ham and made all American sides like macaroni and cheese and Brussels sprouts.

My Dad on Christmas Eve, discussing the
intricacies of Spanish brandy


No matter happens on Noche Buena, we make Cuban sandwiches on Christmas day. This year we roasted a pork loin and used our special order ham to make our Cuban sandwiches. There are two camps for Cuban sandwiches: Either you can use mayonnaise OR mustard. Never both. If you order a Cuban sandwich and it has mustard and mayonnaise--It's a FAKE! (Albeit a delicious fake)

My family is in the yellow mustard camp. Seriously, none of this fancy whole grain or dijon mustard--yellow mustard only. So this post is a review of the Posada family Cuban sandwiches. These sandwiches are a Cuban tradition that have thankfully spread all over the United States to every swank deli, yet probably one of those specialties that is not easily found in Cuban--for now anyway.


Lay out the ingredients
Ingredients:
Bolios (small loaves of bread) or Hoagies
Ham
Roasted pork
Swiss cheese
Dill pickles, sliced
Mustard
A panini pan or a sandwich iron or a frying pan with a press
toothpicks

1. Thinly slice the meats: in this case the honey baked ham and the pork loin
--For the pork loin, I marinated a medium pork loin overnight in a dressing of olive oil, lime juice, garlic and red onions. Then I seared it for five minutes on each side in a cast iron dutch oven, and roasted it in the oven for 45 minutes at 350.
2. Slice the bread open and lay out as many loaves as you want to assemble into sandwiches.
3. On both sides of the bread, spread or squirt a thin layer of yellow mustard.
Progression of the sandwiches
 4. Start to layer the ingredients: I put pickle on one side of the bread (pat the pickles dry first), Swiss  cheese on the other, then layer the ham and pork in the middle.
5. Close the sandwich, pierce it with toothpick to keep in the bread together so it stays closed with pressing

6. Smear a nice thick layer of butter on both sides of the bread.
Butter the bread
Press
7. Heat the pan over low heat, place the sandwiches on the grill and press for about 3-5 minutes, until you see grill marks on one side and then flip and press until you have grill marks on the other side.
8. Once you have nice grill marks and the cheese is soft, slice the sandwiches in half on a diagonal. Serve with potato chips or even better, fried banana chips, aka mariquitas.

Grill Marks


Serve

Sunday, December 6, 2015

Squash obsessed: Butternut squash and pea curry

Finished product: Curry with homemade naan 
Living in Washington, DC has its benefits, including a variety of restaurants, so I can cycle through Indian, Thai, Chinese, Ethiopian, and all the other amazing ethnic cuisines offered in the city. Even though Galveston is near and dear to my heart, it had a few flaws, including the lack of ethnic food beyond Mexican and Vietnamese food. During my years in Galveston, I mastered a few key Indian and Thai dishes. My go-to dish, for cheap and easy eating is curry. I was actually taught how to make curry by an Indian graduate student who was a research assistant in the lab where I worked in college. This guy was living a very stereotypical Indian immigrant experience, written about beautifully by Jhumpa Lahira, in her book the Interpreter of Maladies. He had moved to DC from Delhi to get his PhD in Biology and eventually business degree so he could run a pharmaceutical company back in India. He even had a relationship with a woman in a different caste who his parents didn't approve of. He lived in a two bedroom apartment, near the GWU campus, with 4 other Indian guys who were also in graduate school. My friend, instead of languishing without home-cooked Indian food or eating out all the time, learned to cook and taught he a few tricks such as this basic curry formula, which can also be tweaked to make lentils.
The basic ingredients

Curry is a mainstay meal because you can always keep the ingredients on hand in your pantry and you can use almost any vegetable as the base. I usually make kidney bean curry, and if you don't have an Indian friend to teach you how to make curry, I love this basic recipe from Smitten Kitchen. 

The key to keeping curry interesting is to play around with the ratio of onion to garlic to ginger as well as adjusting the spice level by experimenting with different chili powders and also using different types of fresh chile peppers. Some days I double the ginger and cut down the garlic or I puree the onions instead of merely chopping them.

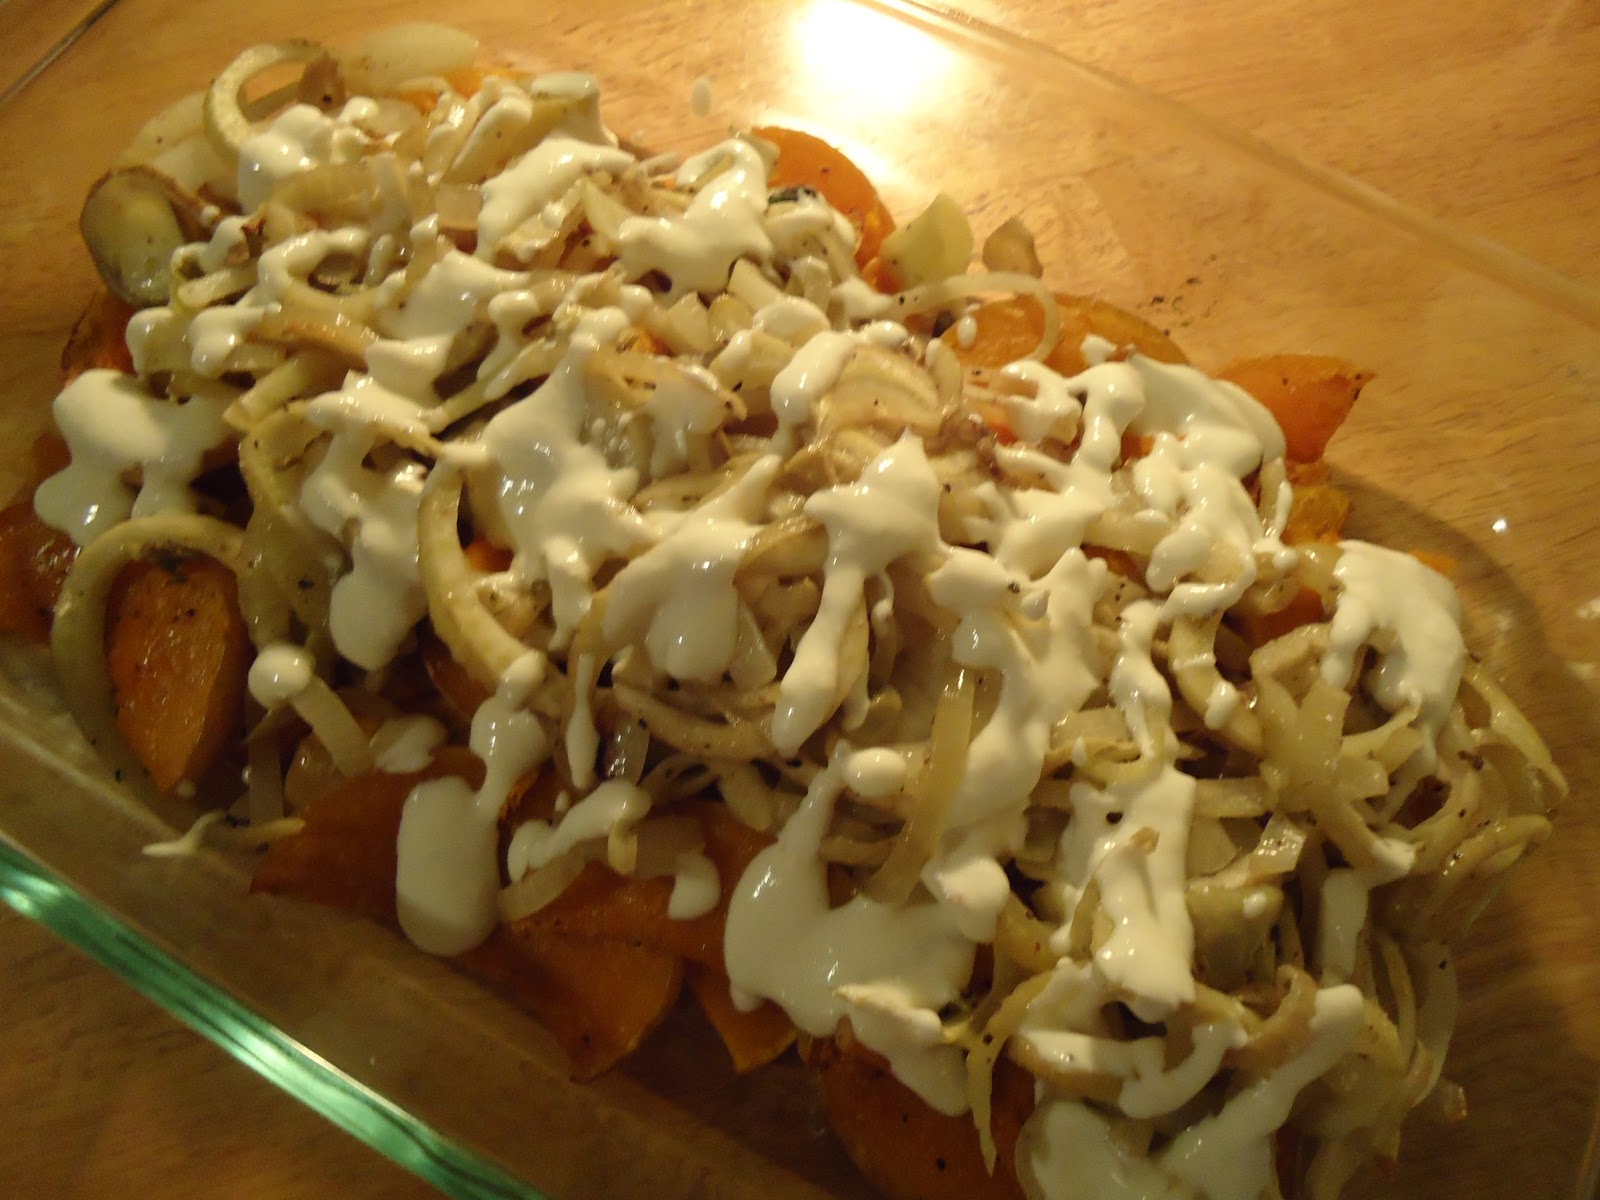
The fall season is always marked by an overabundance of squash. Even if I have a butternut squash at home on my table, I'm still drawn to the squash at the farmer's market. So instead of making lentils or kidney bean curry, I incorporated butternut squash into my basic curry recipe. My major critique of using squash in this curry, is that it turned out sweeter than expected, much sweeter than when I have used carrots or sweet potatoes in the past. Because I assumed the squash would be sweet, I doubled the ginger I usually use

Butternut squash and pea curry

Ingredients:
2-3 tbs of oil, olive oil or canola
1 onion, finely chopped
garlic 3 cloves, minced
ginger, about 4 inches worth, comes about to 2 tbs of grated ginger
one can of diced tomatoes
1 bag of frozen peas
one butternut squash, keep the skin on, cut into small cubes, about chick pea sized

Spices

Spices:
1 tbs of turmeric
1 tbs cumin
1 tbs coriander
1 tbs chili pepper
1/2 tbs cinnamon
1 tsp ground mustard
1 tsp black pepper
salt


1. Prep work: Dice the onions, mince or crush the garlic, grate the ginger, and cut the butternut squash into chickpea sized cubes (with the skin on)

2. Heat the oil over medium heat in a large saute pan

Onions with spices


3. Add the onions, garlic and ginger, and cook for 2-5 minutes until soft, try not to brown


4. Once the onions are soft, add the spices and a few twists of freshly ground pepper to the onions and dry fry the spices and onions all together for 2 minutes, or at least until fragrant

5. Add the canned tomatoes with their liquid to the onions and spices. This will act like deglazing, allowing you scrape up all the spices that may have stuck to the pan
add the squash
add water to the squash before simmering


6. Allow the liquid portion to come to simmer, then add in the butternut squash. Add about 1 cup of water, just enough to have most of the squash submerged. Again, with the pan uncovered over medium heat, allow the liquid and squash to come to a simmer.

7. With the pan uncovered, simmer the squash curry for 10 minutes, which will expedite cooking time and allow some of the liquid to cook off. 

8. Then turn the burner to low and cover the curry. Let the curry cook covered for about 20 minutes, with some minor bubbling at the edges. Uncover and stir 2-3 times to make sure the curry is not sticking to the bottom of the pan. If the curry is sticking, turn down the heat and add a touch more water (a few tbs). 

9. After 20 minutes, the squash should be soft and the mixture should have thickened. Taste the curry now and add salt and pepper as needed. 


The last two steps 
(If you feel like your curry tastes too much like "spice" ie subtly gritty and bitter, add about a 1/2 cup of water and cook for an extra 10 minutes. This happens to me sometimes because I go overboard on the spices. The solution to cut down on the amount of powdered spice you use.) 

10. Once your curry and spiced and salted to taste, add in bag of peas and mix well to incorporate. Then cook the curry for another 5 minutes so the peas are entirely thawed and cooked through and the mixture can become a bit thicker

(Since I usually eat my curry with just naan, I like a thick, creamy consistency. If your tendency is to eat Indian food over rice, then you can cook it over a lower heat or for less time.)  

11. Turn off the stove and let the curry sit for 10 minutes before eating to let the flavors meld.  Eat with naan or over rice. 


I am not a baker by nature; I do not have the patience or attention for detail and problem solving that is required for making really good bread. However, flat breads like pizza dough, pita, and naan are quite easy to make. Working with dough, the kneading, the rising, and shaping the bread is incredibly satisfying and sometimes therapeutic (depending on the week I've had). I will post the Mark Bittman Pita recipe I use for both naan and pita on another post when I make pita with my Jordanian
neighbor.


Saturday, November 7, 2015

Cooking for friends on a weeknight: Roasted butternut squash with roasted onions and fennel


For the first time in my adult life, I have become friends with my neighbor. I have lived in apartments before and never interacted with the people with whom I share my walls. However, this time around, I have befriended one of my neighbors who does neighborly things for me like critiques my Halloween costume before I go to a party and sometimes plays backgammon or the guitar with me. This week, my neighbor gave me a bottle of olive oil from his parent's farm in Jordan and a bag of Zatar, a spice for dipping pita bread. In return, I asked him over for a quick dinner. My plan was to go buy a roasted chicken and make a salad, but I was struck by a sudden urge to use my butternut squash that had been staring at me for a week straight.  The original recipe has a decidedly middle eastern flare, as the original dish is roasted squash and onions, topped with roasted pine nuts and a tahini sauce. I paired my roasted squash with a mezze style meal of pita with Zatar, hummus and a garlic-yogurt sauce. 

My inspiration comes from a Yotam Ottolenghi  recipe posted in the New York Times last fall. Yotam Ottolenghi is a London chef, originally from Jerusalem, who in addition to his very popular middle eastern restaurants, has a great series with the Guardian, posting mostly fresh, vegetarian recipes.I highly recommend you check out this series. His recipes are beautiful and inspiring and just in time for Thanksgiving to branch away from the usual American style side dishes. I'm dreaming of his Turkish inspired eggplant  and stuffed squash.

Sometimes Ottolenghi's recipes require too many ingredients to be an easy weeknight meal. However, this squash and onion recipe is simple, delicious and can be changed to suit what ingredients you have on hand. It's a nice template of roasted vegetables + fancy sauce for garnish and flavor. 

coat generously with olive oil, salt and pepper
This recipe can come together quickly if you have a normal sized oven that fits more than one rack and baking dish. However, I literally have a playhouse kitchen and my oven does not fit more than one dish at a time. I had to roast the squash and onions separately for forty minutes, but if you can do it all at one time, this is a quick and easy dish to pair with a grain or a pan fried protein like chicken or fish filet. 

If you're reading my blog, you're probably my friend and know this blog is an amateur affair. Maybe, dear reader, you've been to my apartment and seen the dearth of kitchen space in my studio apartment. (Here is when I expect you all to be impressed that I cook in spite of these overwhelming obstacles...just kidding) I am playing with my lighting options and where I photograph my food. This post was photographed outside my kitchen on my dining room table using warmer albeit less lighting in comparison the the jarring fluorescent lights of my kitchen.  If you have a strong opinion on lighting or my blog, let me know what you think.  


Roasted butternut squash, onions, and fennel with a garlic lemon sauce
Adapted from Yotam Ottolenghi's  recipe posted in the New York Times 
Total time: 60 minutes

Ingredients: 
Butternut squash
one onion, cut in half and slice
1-2 bulbs of fennel, washed and thinly sliced
olive oil
1 large clove of garlic, crushed in a garlic crusher or finely minced
2-3 tbs of yogurt
2-3 tbs of ricotta cheese
the juice of a whole lemon (about 3-4 tbs)
plenty of salt and pepper

Preheat the oven to 400F

1. Wash the butternut squash, slice it in half, remove the seeds with a spoon. Cut each half into thin moon shaped slices. The peel of butternut softens with roasting  (or stewing) and you do not need to peel butternut squash. If you want thicker slices, when you place the slices on the baking sheet, you will place the squash balanced on its peel making it easier to soften the peel. 

2. Peel and halve the onions and fennel. Then cut the onions and fennel into thin slices. 
3. Place the squash in a large bowl, add 2 tbs of the olive oil, enough to coat the squash and well and season with salt and pepper. 
4. Spread the squash evenly on a baking sheet. Roast the squash for 20 minutes, then use a spatula to flip half way through. My squash baked for a total of 40 minutes, until it was soft and browning. 
5. Using the same bowl from the squash, place the onions and fennel in the bowl and coat with olive oil and season with salt and pepper. Place the onions in a roasting pan or on a baking sheet. The onions can roast in the same oven at 400F with the squash. The onions need about 20-30 minutes of roasting. You want them cooked through but not too browned. 
6. While the vegetables are roasting, in small bowl, combine the yogurt and ricotta, whipping with a fork until smooth and frothy. Then add the lemon juice and the crushed garlic. Whip again with a fork until smooth. Then season with salt and pepper. I seasoned my vegetables fairly liberally with salt and pepper so I seasoned my sauce with only pepper to let it have a prominently lemon flavor. Let the sauce sit and meld in the fridge. 
7. Once the squash and onions are cooked through, transfer the squash to the serving dish first. Arrange the squash as desired on the bottom and then arrange the onions on top of the squash. Using a spoon, drizzle the yogurt sauce over the vegetables. Theses are fresh Fall vegetables, so I did not drench my vegetables in the sauce. I reserved some of the sauce to use as a dip for our pita bread. 
8. You can serve this dish warm or at room temperature. 
Artfully arrange the vegetables

Drizzle with sauce

Wednesday, September 23, 2015

What interns eat: Peanut Butter and Jelly Overnight Oats

What I eat as an intern varies with each rotation. Overall the theme of cooking as an intern involves making food that comes together quickly and does not need to be refrigerated. I'll address the lack of refrigeration in a future blog posts, and you can refer to my black bean salad for a meal that can stored in your lunch box or backpack without a cold pack. I realize I could also just buy a cold pack or a better lunch box and solve this problem...

I spent the last 2 months working on the general internal medicine wards. I had a very regulated schedule of 6:30am to 6:30pm during the week, a long call day every 5 days, and working one weekend day until at least 3:30pm. The schedule is tough and sucks away any energy that might be left for studying or regular socializing. However, the hours are bearable because all interns are going through the same experiences,so there's a feeling of camaraderie throughout the hospital.  For the past 2 weeks, I've had a change in schedule working in the GW Hospital emergency department. Though I get more days days off per week on this rotation, I have had a hard time adapting to the strange hours and hectic, frenzied pace of the emergency department. Strangely, what irks me the most is the lack of time eat away from my computer. Most shifts, I eat a protein bar or trail mix while typing away at patient notes.


What I miss about my internal medicine rotation is the regularity of my schedule. Each morning, I could arrive between 6:30-6:45am, sit down at my computer to read about patients while eating my breakfast and drinking my coffee. I have a tendency to get obsessed with a certain food and eat it for too long.  For 2 months straight, every morning, I ate these overnight oats out of a mason jar. I miss those seemingly leisurely mornings, and I look forward to those mornings on internal medicine and eventually psychiatry rotations.

The concept of overnight oats is soaking "quick oats" overnight in liquid so they are soft enough to eat in the morning. There are many versions online of overnight oats, including peanut butter and jelly, almonds, coconuts, and dates, and sweeter, chocolate based recipes, and also many include chia seeds and other spices. Chia seeds will make the oats more gelatinous, and this reminds me too much of baby food. I could add more spices, but sometimes I'm lazy. Maybe for winter when I need more spice in my life, I'll add cinnamon, nutmeg or even pumpkin to my overnight oats.

Here are a few good links for overnight oats:
http://www.katheats.com/favorite-foods/overnightoats
http://ohsheglows.com/2015/07/22/vegan-overnight-oats/
http://www.bonappetit.com/test-kitchen/common-mistakes/article/how-to-make-overnight-oats

 My recipe is adapted from several online sources. Perhaps for my next two months of overnight oats I'll try a new version. For now, I offer you Peanut Butter and Jelly Overnight Oats. My unique contribution is that I use Trader Joe's Quick Cook steel cut oats. Because these are harder, basically small pebbles, even after being soaked overnight, they yield a firmer product in the morning. This way I avoid potential baby food or liquid concrete consistency.

When I make this recipe for myself, I use an assembly line approach and make 4 jars for the week.


Peanut Butter and Jelly Overnight Oats:
Soy milk
Quick cook oats (either rolled oats or steel cut oats)
Plain yogurt
Plain peanut butter, (I keep a jar of the Smucker's natural peanut butter which is also perfect for Asian peanut sauces)
Sugar
Frozen berry medley
Mason jar

Each step should be replicated for however many jars you want to make for the week

1) In the mason jar, stir together, 1 tablespoon of peanut and 1 tablespoon of plain yogurt and 1 teaspoon of sugar

2) On top of this mixture, pour in 1/2 cup of dried oats


3) On top of the oats, add in 1 handful of frozen berries, about 1/2 cup

4) On top of the oats that will be eaten the next morning, pour in 1/2 cup of soy milk. You can adjust the liquid to change the consistency of the oats. For firmer oats, stick to 1:1 ratio of oats to soy milk. For a more liquid product add up to 3/4  cup of soy milk.


One for tomorrow and ready for the
rest of the week

5) Mix together the oats, berries, milk mixture and let it sit in the refrigerator overnight.

6) You can store the rest of the prepared oats in the fridge, and the night before you plan to eat the oats, add in the soy milk, mix, and let it sit overnight. Re-mix the oats in the morning for a good distribution of berries, oats and peanut butter.

7) Experiment! Add a banana or almonds or cinnamon or more sugar or chocolate chips or cheerios to make your Friday morning that much better. Go crazy. What I love is that every morning, I get a pre-made, healthy, non-processed breakfast, made with love by me for me.  To survive residency, I think I will need lots of rituals and acts of self care, and overnight oats falls into this category.


Ready to cover and mix in the morning for instant breakfast


Wednesday, September 16, 2015

Cooking with friends on a weeknight: Asparagus, mushroom, rice gratin

I hope "cooking with friends on a weeknight" will become a feature of the blog. Cooking with someone else and blogging about it proves it is possible to be an intern and maintain a social life outside of drinking wine and watching TV on my tablet. That said, for someone who counsels patients on establishing and maintaining healthy habits, I know I do not sleep enough and maintain myself on liquid caffeine, daily yoga, and lots of chocolate for extra energy. Basically I'm asking for a daily sugar crash and helping my family history of type 2 diabetes express itself.  For now I think the benefits of spending time with friends outweighs the benefits of 8 hours a sleep a night and ingesting too much processed sugar.  Let's see how I feel in another month...

I am currently on my Emergency Medicine rotation which means I work many night shifts and have some free daytime hours. Though the strange sleeping schedule  will eventually catch up to me, I love having the daytime hours off. I happened to have a full day off on Wednesday.  The weather is perfect in DC with low humidity, high of low 80s, and daylight that lasts until 7ish. With my day off, I offered to bring ingredients for a "surprise dinner" to my friend E's house. My plan was to walk around Trader Joe's and see what ingredients jumped out at me. I am proficient enough in my own kitchen to buy random ingredients, usually whatever is in season, and at home I'll look up recipes or just make my usual meal of roasted vegetables with tofu or eggs.


Today I actually had to walk out of the store with ingredients to make a satisfying meal for other people. When I need inspiration, I usually look at the front page of my current favorite blogs. Before walking into TJ's I checked out Cookie and Kate, Serious Eats, and Smitten Kitchen. Smitten Kitchen has gorgeous pictures and delicious recipes, but can be hit or miss with actually providing accessible after work (I'm tired and have no time) dinner recipes. Today, however, Smitten Kitchen did not disappoint. The home page featured a summer squash rice and cheese gratin inspired by Julia Child.
The joys of cooking an a friend's (much larger) kitchen

Inspiration is the key word. I was unimpressed by the summer squash at Trader Joe's and the Foggy Bottom Farmer's Market (Weds, 3-7pm) that likely was overflowing with summer squash and peaches did not open for another 2 hours. So I made do with Trader Joe's produce. I ended up buying asparagus, mushrooms, rosemary Asiago cheese, and a pork loin as the protein.


Dinner was a success: As an appetizer, pan fried Shishito peppers tossed with lemon juice and salt, followed by roasted pork tenderloin served with asparagus, mushroom, rice gratin, and brownies for a decadent finish. This meal satisfied several senses, as E and I painted with watercolors as the gratin and meat percolated in the oven.
Browning the tender loin and pan frying the Shishito peppers

Here I present an original recipe: Asparagus, mushroom, rice gratin aka a quick and fancy casserole

Ingredients:
1 pound of asparagus
1 package of sliced white mushrooms
1 yellow onion
1/2 wedge of Asiago or Parmesean cheese
1 cup of rice
1.5 cups of water
olive oil
salt
pepper
1/2 lemon, optional
medium sized baking dish

Preheat oven to 350 degrees F
1) Wash and trim asparagus, chop into 1 inch pieces
2) Dice onion and coarsely chop the sliced mushrooms. Over medium temperature, heat olive oil in a skillet. Saute the mushrooms and onions for at least 5 minutes, so the onions are softened and some water releases from the mushrooms
3) In a small pot, bring the 1.5 cups of water to a boil, add the 1 cup of rice and boil for 5 minutes. After the 5 minutes, turn off the heat and allow the rice to sit in the water while you finish preparing everything else.
4) Place the asparagus into the baking dish, pour in the mushrooms and onions. Combine well, then pour in the rice and water. This water will allow the vegetables and rice to steam during baking to complete the cooking.

You can be as generous or stingy on the cheese as you like. Most gratins are saturated with fats like butter, milk/cream, and cheese. In this gratin the major fat is the cheese and a bit of olive oil.

5) Using at least half of a medium sized wedge of Asiago or Parmesan cheese: crumble half your cheese using your hands, basically making small cubes, and use a grater to finely grate the remaining cheese. Add the cheese in with the vegetables and rice and combine well so you can see cubes of cheese throughout.
6) Season this mixture with 1 tsp of salt, a few grinds of pepper and the juice of half a lemon. Stir to combine, then use a spoon to smooth the top.
Before baking

7) Cover tightly with foil, and bake in the oven at 350 for 20-30 minutes. This gratin baked in the oven at the same time as our pork loin for 25 minutes.

For a traditional gratin you can add breadcrumbs and cheese to the top of the gratin, and broil at 450 for 5 minutes.
The finished product after serving 


Sunday, September 6, 2015

What interns eat: Mexican corn, bean, and zucchini salad aka corn salsa

As many of you know, I am a psychiatry intern who started on July 1, 2015. I'm currently on internal medicine wards, so I'm living the life of a traditional intern working at least 80 hours  a week and learning so much that sometimes I feel like my brain is expanding out of my skull. It's an interesting  and tiring feeling . Who knows why I felt the need to start blogging again the in the context of being tired and overworked. My psychodynamic theory is that I need to identify with something other than medicine so activities like food blogging and yoga keep me human. 


I am one of the lucky interns who works Labor day. Mostly I'm happy that I'm not the unlucky intern working Thanksgiving or Christmas. Who knows what patients I'll encounter tomorrow...Maybe the sweet grandma with community acquired pneumonia? Or perhaps, more likely, the older, usually drunk gentleman, who decides that Labor day weekend is the perfect time to try to quit alcohol and starts withdrawing. In order to provide compassionate and effective care in either one of these scenarios, I pack breakfast and lunch of delicious food prepared in my tiny kitchen. 

I find cooking relaxing. However, I cook for both sustenance and a way to unwind--I have to be efficient in the kitchen. Today, in 2 hours,  I prepared an eggplant and tofu stir fry, the vegetable salad I present today, and made breakfast for the week. This way I have most of my meals covered throughout the week and can supplement the missing meals with fried eggs or kimchi quesadillas. 
Lots of tiny kitchen cooking and dish-washing

I've recently made many iterations of the "vegetable salad" which is basically chopped vegetables tossed with a tasty sauce. Last week I made a tomato, artichoke heart, cauliflower, pesto salad.  A vegetable salad is versatile  and can be eaten over rice, noodles, with an egg, on top green salad, or any other way your imagination might lead you. I make a good amount of the chopped vegetable salad and eat it in a variety of ways for either lunch or dinner. This way, I'm not always eating in the hospital cafeteria or spending too much money at the super trendy and too attractive Whole Foods two blocks from my apartment. 

This week, this vegetable salad is a result of half-hearted grocery shopping as I haven't sincerely grocery shopped in two weeks. I cobbled this salad together with vegetables left over from my last trip to  the farmer's marks and this morning, I went to the Dupont farmer's market with a visiting friend. 

Farmer's market goods and the
last of my HEB products


Mexican corn, bean, zucchini salad with salsa verde aka the Mexican chopped vegetable salad aka corn salsa

2 ears of sweet corn with the kernels off the cob
2 summer squashed, halved and thinly sliced
1 clove of garlic thinly sliced
a large handle of cherry tomatoes, quartered
3 carrots, cut into small cubes
1 can of red kidney beans or black beans
about 1/2 cup of green salsa (Usually, I prefer the small can of Herdez salsa verde sold in the Latin section, but I had the end of a jar of Trader Joe's Hatch Valley green salsa
olive oil
salt to taste

Chopping all the vegetables is the most time consuming part of this recipe, but once everything is chopped, the salad comes together in 10 minutes


1. Start by washing and thinly slicing the zucchini aka summer squash and slicing the garlic
2. In  large frying pan, add 2 generous tablespoons of olive oil, once warmed over medium heat, add the sliced garlic to flavor the oil. Do not burn the garlic, we are going for a subtle taste of garlic. Add the sliced zucchini in a flat layer to the oil, and let it sit without stirring for about 5 minutes. The goal is lightly browned zucchini. After these 5 minutes, shake the pan, cook for another 2-3 minutes and then pour the zucchini into a large bowl. 
3. While the zucchini is browning, you can start to prepare the rest of the vegetables: slice the kernels off the corn, cube the carrots, and tomatoes, wash the kidney beans
4. Combine all the vegetables together in a large bowl. Add the green salsa to the vegetables, and gently mix together. Add salt to taste.


 Enjoy as a salsa with chips, use it as the filling for tacos, eat as a topping for fried eggs, the options are many. Another great addition is adding avocado and scallions right before you serve it.

 This salad can be made with any type of vegetables that mix well with Mexican flavors. In winter time when I want homemade salsa, I use canned corn, canned black beans, radishes, red onions, and carrots and because of modern agriculture tomatoes are available year round. The basic formula is canned beans, 2 types of crispy vegetables, tomatoes, a little bit of onion and salsa. Viola, you have food  for a party or food for the week. 

Mason jar lunch